Pages

Thursday, November 12, 2015

Human Body

     Okay, so keeping my blog current is apparently not my greatest strength!  We have done all sorts of units since the last post on Australia!!  Two that I really wanted to highlight were the units on Tall Tales and Woodland Animals, but I did not have the time while we were doing them.  Maybe I can go back and do a post on them later.  For now, I thought I'd share some things we've been doing in our study of the human body. 
     The first day we studied the body, we read Inside Your Outside a Cat in the Hat Learning Library book.  It provided a good overview of the main body systems.  We talked about our body being made up of tiny units called cells. Then, we used a microscope to examine epithelial cells from inside our cheek.  (We used a toothpick to scrape the inside of our cheek, rubbed it onto a slide, and added a drop of iodine to stain it for easier viewing.)


      While the microscope activity was interesting, the biggest hit of the day was when I unveiled a model of the human body I recently purchased in anticipation of this unit.  It is actually meant to be a toy, but is a fairly authentic representation of the body and I knew it would not only serve as a wonderful visual aid, but would also allow my son the opportunity to take it apart and reassemble it, thereby learning through hands-on experience how our organs fit together and what belongs where.  He loves it!  It is called Squishy Human Body, in case you are interested.

Fully-Assembled Squishy Human Body

Taking "Mr.Squishy" apart

Putting it all back together....could he be a future surgeon?

     Day two was also full of adventures as we learned all about our blood.  We read A Drop of Blood
  which was a wonderful introduction to the blood and its primary components and functions.

Our phonics focus was on the /bl/ blend for blood.
 
     Next, with a small prick of my finger, we examined a real drop of blood under the microscope at high power and were able to see thousands of red blood cells with their characteristic "donut" shape.


     We made a model of the blood as well.  I found this idea, in many variations, on Pinterest.  For our version, we used Karo syrup for the plasma, Red Hot candies for the red cells, mint (white) Mentos candies for the white blood cells, and round sprinkles for the platelets.  Everyone said to use Karo Syrup for the plasma, but I found it to be a little too thick! I had to add a little water to the mixture just so the candies could move around in there a little.  Should I ever find myself making this concoction again, I believe I will try cooking oil instead.

Blood Ingredients

Mixing the blood
 
Completed Blood Model
     

Finally, we used the same candies to make a paper model of a drop of blood.


Red blood cells, white blood cells, and yellow platelets.


    Next, we learned about the heart and circulatory system.  I borrowed a medical-grade stethoscope from my cousin, who is a physician, and we listened to our heart beating and learned about how the heart pumps blood through our bodies!

When we studied the skeletal system, we used more candy to build a model of our backbone!  We used a pipe cleaner as a "spinal cord" and strung life saver gummies (vertebrae), alternated with Cheerios (discs) to see how the discs protect the bones from grinding against one another and allow us to move in many different directions!
Making the spinal column

Completed spinal column
 Finally, we learned about our digestive system.  We used a piece of bread and some Sprite to simulate how the stomach acid, plus some active churning, breaks our food up into tiny particles and creates a sort of "soup" of all that we've eaten.
Breaking the bread into small pieces simulated the chewing process.

Adding Stomach Acid (Sprite)
                
Stomach (bag) churning (squishing) the contents into its digestive "soup"
                    
One more thing we've done is a flip booklet on the human body.  I purchased this off TPT.  It is by Stephanie Trapp, and is really cute and inexpensive!

Click HERE for the link to this cute product!
This was a two week unit and really engaged my son!  If you plan to teach a unit on the Human Body, I would definitely recommend these activities! 

Blessings,
Laurie
Wednesday, September 9, 2015

The Land Down Under

So, we spent last week "visiting" the Land Down Under!  I have to tell you that a REAL visit to Australia has always been on my bucket list, and this study just made me want to go all the more!  What a unique and interesting country!


On our first day, we located Australia on the map, and learned about some of the famous landmarks there such as the Outback, Ayers Rock, and the Sydney Opera House.


For our craft that day, we used a quarter-sized piece of poster board,  some paint, and paper plates to create the famous architectural wonder which stands in Sydney Harbor.  This is an idea I found on Pinterest.  Thought it turned out cute!


The next day, we learned a little Aussie slang.  It's fascinating to hear all the different ways the Australians have come up with to refer to common people, places or things!  For example, a male is a "bloke," a female is a "sheila," and a friend is your "mate."  If you want some chewing gum, better ask for some "chewie" instead. 

 It was really fun to listen to a little Australian music as well!  The Waltzing Matilda is Australia's unofficial national anthem, but it has absolutely nothing to do with dancing!  It's actually a ballad about a homeless man "waltzing matilda" (backpacking) through the "brush" (Outback) who chances upon a "jumbuck" (sheep) drinking at a "billabong" (pond) and catches it for his next meal.  The "squatter" (land owner) catches him and brings the "troopers" (authorities) in to arrest him, but the "swagman" (homeless man) will have none of it.  He jumps into the billabong and drowns, preferring that outcome to being imprisoned. According to the song, his ghost can still be heard when you pass by that billabong, singing, "You'll come a waltzing matilda (backpacking) with me!"  If you'd like a charming version of this song to show your children, try this link on YouTube: Waltzing Matilda by Slim Dusty.


As you might expect, we spent a good portion of the week learning about all the unique and amazing animals Australians enjoy! 

     This koala craft was made by painting his hands (minus the thumbs) gray and white, and adding a gray circle with a face.  Cute, but blissfully simple!

The next day, we learned not only about kangaroos, but also about Haiku poetry.  If you are not familiar with Haiku, it is a Japanese form of poetry in which the first line has five syllables, the second line has seven syllables, and the third (and last) line has five syllables.  Most Haiku poems are about something in nature. We wrote a "Kangaroo Haiku," which fits neatly into the kangaroo's little pouch!  If you are interested in this item, the pattern and form are available in my Australia Unit on TPT.
  

We also learned about the native Australian Aborigines.  They are famous for their dot paintings, so we attempted to copy that idea with this fun kangaroo:

                            
Our centers this week consisted of a color by the sum page (addition practice),  clothespin clip cards in which he had to add three numbers together, making sentences with Australian words, and this center, in which he had to read a sentence and determine the part of speech of the underlined word.  All of these activities are included in my Australia Unit on TPT.  If you are interested, click HERE.


Well, that's pretty much our week.  It was a fun one!  (Any unit filled with that many cute animals is a fun one for me!)  : )   

I hope you are having a great day that's full of joy!  Thanks so much for visiting!

Blessings,
Laurie


Wednesday, August 26, 2015

Egypt ~ Then and Now

     Well, if you happen to find yourself (or that kid who got on your last nerve today!) in need of mummification, I've got just the fellow for the job!  He's only seven, but he can tell you all the steps in the process!  If you haven't already guessed, we've been studying Egypt for the past week and a half! 
     We began last week by learning to locate Egypt on a map, and getting to know about the country as it is today.  But my son's favorite part of the unit by far has been our travel back in time to Ancient Egypt.  Here are a few of the things that have been keeping us busy:


Egypt is the first stop on our "Around the World in 180 Days" adventure.  I plan to spend a good chunk of this school year studying other countries and cultures. To help remember our "trips," I created this interactive travel journal where my son can chronicle what he's learning.


On the first page, we have a fold-out world map on which he colors in the country we are "visiting."

 I had him add a fact or two about Egypt as well.


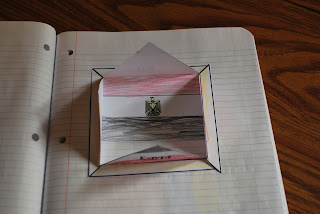
The next page opens to show the modern-day Egyptian flag.


I wanted to have him write here about the colors of the flag and what they represent, but we ran out of time.
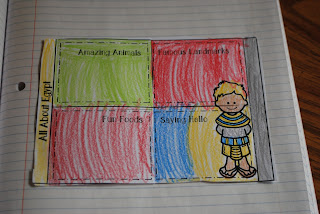
The next page has four tabs which open to reveal various facts about the country.  In case the pictures aren't clear, the tabs say: Amazing Animals, Famous Landmarks, Fun Foods, and Saying Hello.

Here is what my kiddo wrote under the Amazing Animals tab.  I told him he must list at least two of the animals we talked about.  Notice how he chose the two most deadly!  (What is it with boys being magnetically attracted to danger?)


I admit we did focus on crocodiles for one day.  We read Bill and Pete Go Down the Nile and completed the following chart:
Next, we had fun with this cool crocodile weaving project I found on Pinterest!  He's never done weaving before, but picked up on it pretty quickly.  Turned into a cute craft!  Great for fine motor skill development too!
 Here's the final product.  Please forgive the red eyes.  Seven-year-old boys (or at least mine!) think EVERYTHING has to be evil-looking!  I should note here that the version I created as a sample had wiggle eyes and was adorable.  But he wouldn't hear of having a CUTE crocodile!  (Sigh....) 

I did manage to get one cutesie craft done though!  On a different day, we learned about camels...the ships of the desert.  We read How the Camel Got His Hump and did the chart as shown.   

Next, we did a handprint camel!  Isn't it precious??  This is a definite keepsake! 


This week, we talked about pharaohs and mummies.  Here is our pharaoh craft.


 My son enjoyed the Egyptian Graphing Page he did as a center this week as well. 

Here is a picture of the cube he rolled and the data recording page. Copies of this activity are included in my Egypt Unit from TPT, which is accessible at the bottom  of this post.


 For a fun science project, we are going to do some mummification of our own.  We are going to try to mummify an apple.  This is an activity I bought off of TPT, and comes with complete instructions plus an interactive notebook page or two.  Here is the link, if you're interested:
Apples & Mummies, By: Kelly's Classroom
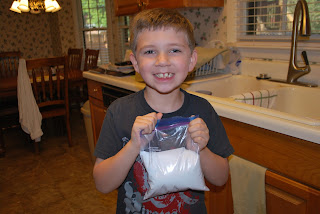
It's a pretty simple project, really.  You wash the apple, carve a face into it with a knife, put it in a ziplock bag and cover with salt and baking soda.  Wait one week before removing it.  The theory is that the salt and baking soda will work like the natron salt the Egyptians used and will absorb all the liquid to dehydrate the fruit.  Should look interesting when we're done.  My son thought this project was super cool! "We get to make a mummy???  Cool!!!"  
Now he can't wait for next week to get here so he can see his "mummy."  The instructions say that it may take up to two weeks to have the full effect, so I hope he will at least be able to see some changes after only one. 


If you are interested in any of the activity sheets shown in this post, they are available in my Egypt Unit on TPT.  Click HERE to check it out!  Here's a quick preview of some of the other things that are included:

Thanks for stopping by today!  Have a great week!

Blessings,
Laurie


Saturday, August 22, 2015
Follow my blog with Bloglovin
Friday, August 7, 2015

Pirates, Ho!

Well, we've survived the first week of school!  I know some of you haven't even begun school yet, but we started last Tuesday.  Being that we homeschool, we did not need to spend time with "Getting to Know You" activities, or going over routines and procedures.  So, we were able to jump right into learning!

In an attempt to get my son excited about going back to school, I elected to spend our first couple of weeks learning about one of his favorite topics:  Pirates!  Here are just a few facts we've discovered:

  • Pirates have been around for as long as there have been ships at sea.
  • The Golden Age of Piracy, the time during which the most famous piracy took place, lasted from the mid-1600s to the mid-1700s.  It was during these years that all the famous pirates like Blackbeard, Calico Jack, and Captain Kidd did their looting.
  • Pirates considered treasure to be more than just gold and jewels!  For example, they frequently raided ships to steal fresh food and water, medications to treat common illnesses, supplies like new ropes and sails, tools and weapons, and especially maps of local coastlines!  
  • When pirates did strike it rich with chests of gold, they rarely buried them!  Instead, they headed to islands like Tortuga (yes, it's a real place) to enjoy their good fortune by gambling and drinking it away.  Most often, they spent their treasure as fast as they stole it!
In addition to the historical significance of this unit, we've incorporated the theme into our language arts time as well.  Here are a couple of charts we've done so far:


In addition, we've set our reading series aside for this week to focus on some non-fiction passages I created about pirates.  These passages are available in my Pirate Unit on Teachers Pay Teachers. We used Guided Reading to read the passage, and then my son answered the comprehension and inference questions that went along with the reading.


My son has enjoyed some of our pirate centers this week as well, including this one featuring subtraction facts practice clothespin clip cards:


But, of course, we've had some fun along the way as well!  Here are a few samples of our crafts from the week:

The pirate he was supposed to make.

Seven-year-old boy's version. I guess it IS more realistic.


Our spyglass made from a painted paper towel tube and a party cup.  (Embellished with metallic gold tape.)  This was not my creation....got it off Pinterest!


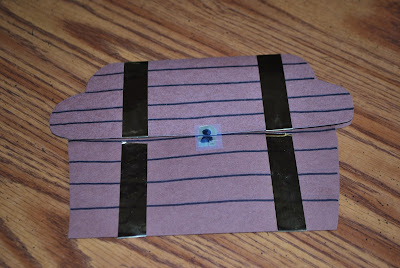
Treasure Chest......outside.....


....and inside.


Finally, I must share my favorite of his creations from the week!  We talked about treasure today and I explained that treasure did not have to mean gold or silver, but could be anything of value.  Then I had him complete a writing prompt that asked, "What do you consider a treasure?  Draw a picture of it and write about why it is special to you."  He didn't follow the directions exactly but, hey.......do you think I had the heart to correct him????  This is one of those precious moments I think about on days when I wonder why I am homeschooling!! 


If you are interested in having this writing prompt for your own children, you can grab it for free below:
Click HERE to download page. 

Hope you enjoy this and that your responses are as sweet as the one I got!  Have a great weekend!

Blessings,
Laurie